After many days and quite a few trips to the local home improvement store, we are finally finish changing our daughter's room.
Some really helpful tools we used were:
1.) Paint edger; This was so helpful. Painter's tape can be very helpful, but a tool like this sort of eliminates the need for so much of it. It's an awesome way to paint right up to the edge of the wall, ceiling, or outlet neatly and efficiently. I recommend it a kajillion times over.
2.) Command hooks / strips: We used these to avoid putting holes in the wall for the "picket fence", hanging curtains, and dress up corner. They are convenient and will make any changes to the room or any moves we have to make that much less stressful because we didn't have to drill any holes in the wall that will need to be repaired.
3.) Contact paper: Covering flaws that will inevitably come when any kind of wear and tear happens to the furniture is as easy as pie with Contact paper. We used a wood grain pattern to keep in line with the enchanted forest decor. We used it to cover the toy box and clothing dresser. It worked really well. But, keep in mind there are countless possibilities in styles and things that can be done with it.
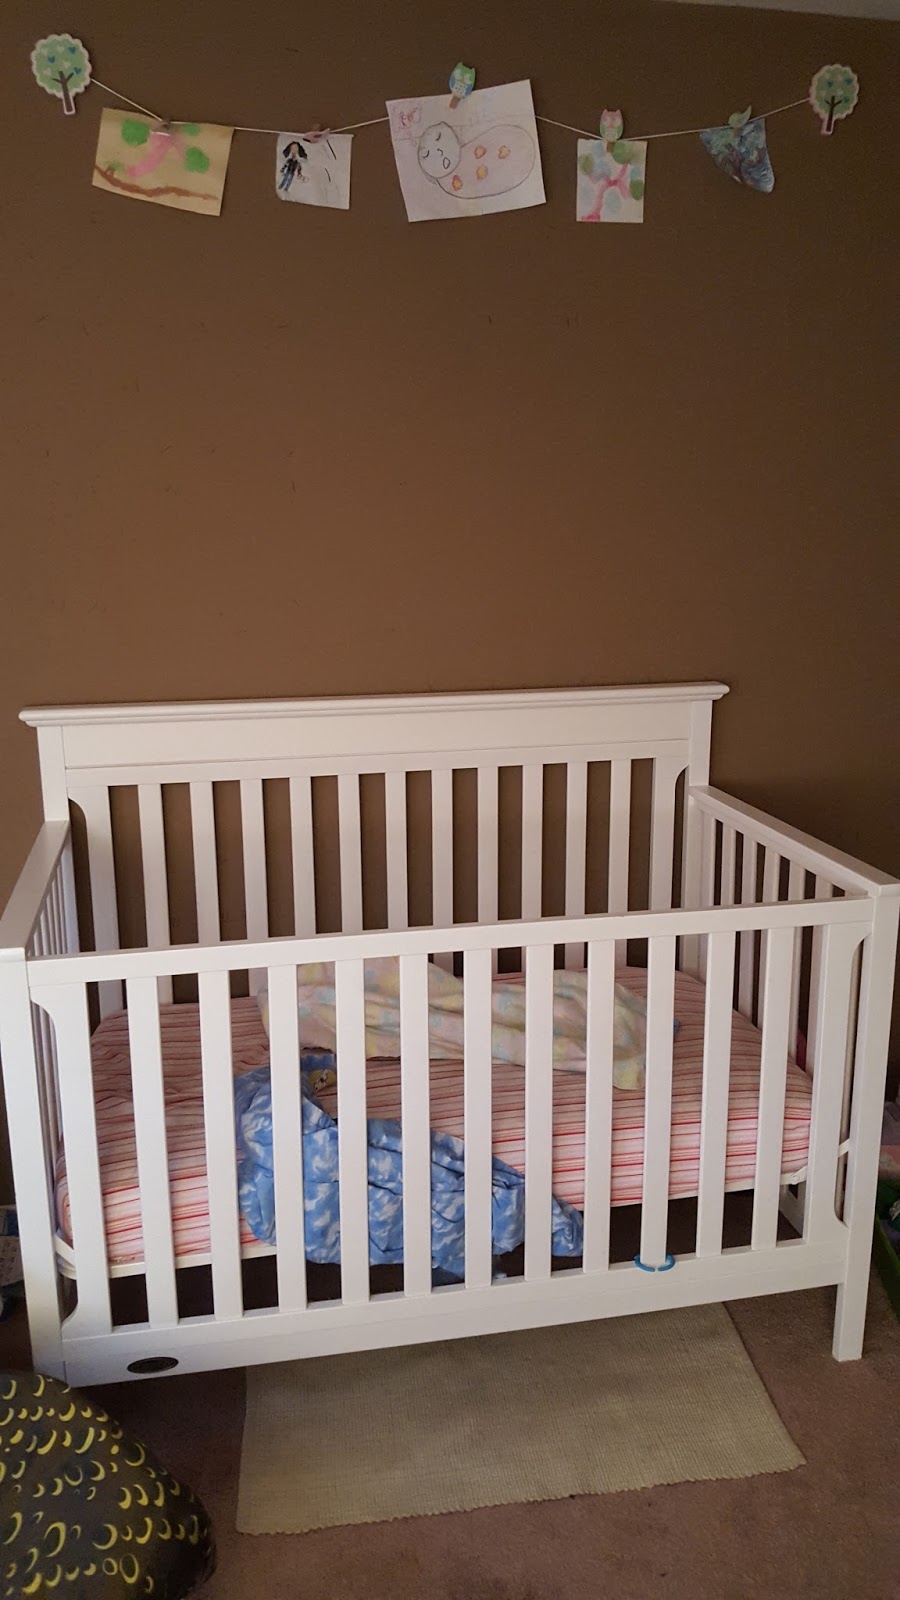
Before:
 We were working with an infant room that our daughter had seriously outgrown.
 With a crib, rocking chair, infant swing, changing table, and diaper pail, it was clear she had outgrown her space and it was time to make a change.
So, we planned to move everything out, touch up the paint, and adjust it all. After running into a problem with the paint "touch up" and fixing it with a full paint job, it was smooth sailing.
After:

We added a toddler bed.
We added many storage areas.
 The toy box went through a remodel of its own, as we added Contact paper to each side to make it feel like a log in a forest. The three tier cube storage was fairly inexpensive and really easy to put together. It's holding legos and building blocks, along with some of her favorite toys. That way they're easily accessible and she won't have to pull root through the toy box to find them. We discovered that most of the messes kids make comes from having to empty out the toy box just to find the toy they really want. This way she can get to it easier and keep it neat.
 This storage box is stackable, so if we need to add more later we can. Right now it's only housing the tons of stuffed animals that she falls in and out of love with regularly. They are easy to put away and look neat when they're not on her mind. It's as easy fix to having them all over the room.
 This dresser was a changing table before. We took away the changing pad and covered it with wood grain self-adhesive Contact paper to help it blend into the decor more readily. Since she had written on it with orange marker it was clear it would either have to be repainted, or somehow covered. Contact paper became a life saver in this instance. Not only did it cover the scribbles, but it added a decor element that makes the room even more fun.
The storage on top includes a yarn spool that's holding her wrap around barrettes. She has many colors and sizes so this sorts it really well. The other organizer is for the barrettes that clip onto the end of her hair. There are so many of them in so many sizes, shapes, and colors that we needed a way to store them and keep them sorted. This way hair care time is quicker and more efficient.

Some really helpful tools we used were:
1.) Paint edger; This was so helpful. Painter's tape can be very helpful, but a tool like this sort of eliminates the need for so much of it. It's an awesome way to paint right up to the edge of the wall, ceiling, or outlet neatly and efficiently. I recommend it a kajillion times over.
2.) Command hooks / strips: We used these to avoid putting holes in the wall for the "picket fence", hanging curtains, and dress up corner. They are convenient and will make any changes to the room or any moves we have to make that much less stressful because we didn't have to drill any holes in the wall that will need to be repaired.
3.) Contact paper: Covering flaws that will inevitably come when any kind of wear and tear happens to the furniture is as easy as pie with Contact paper. We used a wood grain pattern to keep in line with the enchanted forest decor. We used it to cover the toy box and clothing dresser. It worked really well. But, keep in mind there are countless possibilities in styles and things that can be done with it.
Before:
 We were working with an infant room that our daughter had seriously outgrown.
 With a crib, rocking chair, infant swing, changing table, and diaper pail, it was clear she had outgrown her space and it was time to make a change.
After:

We added many storage areas.


The storage on top includes a yarn spool that's holding her wrap around barrettes. She has many colors and sizes so this sorts it really well. The other organizer is for the barrettes that clip onto the end of her hair. There are so many of them in so many sizes, shapes, and colors that we needed a way to store them and keep them sorted. This way hair care time is quicker and more efficient.

We also added many decorative elements that help make this room enchanting and fun, as much as it is efficient. There are many decor choices that make tie into the enchanted forest theme.
The curtains are from the decor section of a local department store. When I saw that they were leaf green and deep brown with lots of leaves all over, I was sure they would fit in perfectly. They were also economical since two panels were sold together instead of having to get each one separately.